It was high-time my car needed some “VIP-style extreme detailing treatment”. Keeping your car looking pristine and well-detailed in Karachi’s harsh, dusty environment is next to an impossible task. However every car enthusiast loves to see his baby shining like the day she came out of the factory.
While I do mini-detailing sessions every week which includes high quality wax, there’s nothing like a once-in-six months VIP detailing treatment. This time I decided to go completely extreme and tend to every nook and cranny that my car has to offer. I also brought out my entire detailing arsenal to decide what to use for this session. From the extreme left to extreme right here is an explanation of the items in my arsenal and why I’ve chosen to use or not use a particular item:


- 3M leather care spray: My car is equipped with genuine leather seats. Just like any fabric leather too needs treatment to make it look new. The key problem areas of leather are:
- Leather is like skin so it acquires fine and visible wrinkles with age, although the seats on my car has very few, they are still there and these have a tendency of picking up dirt and grime which give the wrinkles a pronounced look.
- Since the leather in my car is red and black, the red is obviously a dye & dyed leather needs treatment to keep its vibrant luster.
- For this purpose after a lot of trial and error I’ve picked 3M’s leather care spray as it takes care of these two areas with relative ease.
- Turtle Wax Black Chrome (2 bottles): This is good for treating faded black plastics on a car’s exterior. Although this is in my arsenal, I don’t use it often because:
- It takes too long to apply properly
- My car doesn’t have problematic faded plastics
- I have a secret weapon I’ll discuss later which does a better job of blacking out problematic plastics
- Mothers back to black: Used for the same purpose as #2 however more effective and faster but still not as good as my secret weapon.
- Turtle Wax Tire Foam: This is good stuff for cleaning your tires with and once washed off doesn’t leave your tires feeling slick. Comes with a convenient brush to clean the tough spots with.
- Mothers Protectant: This is an interior cleaner which leaves a slick finish. I don’t use this too often because it leaves a greasy feeling. Only in extreme cases, I believe should this product be used. It does a good job of picking up dirt, but then you need to get rid of the slickness and unnatural shine it creates. Ergo I will not be using this.
- Meguiars Quick Interior Detailer: This is a fantastic product and what I will be using to clean my car’s interior with. Here’s why:
- It leaves a matte finish which looks natural
- It cleans out grime that you don’t even know is there
- Meguiars PlastX: Great for cleaning out the dull haze that headlights/taillights and acrylic surfaces have a habit of forming. It also works great on the RX-8s piano black glossy interior panels.
- Liquid Turtle Wax (the green bottle behind PlastX): This is “okay” for the lazy car waxer. I will not be using this though.
- 3M Perfect-It (the big unlabeled black bottle): This is by far one of the best rubbing compounds which is not too abrasive. It will remove those pesky paint swirls if applied by a circular polishing machine or give your paint an excellent shine if applied by hand.
- Meguiars Color-X: This is a cool product (for the lazy detailer), its a mixture of a wax and rubbing compound thats good for getting rid of paint swirls and leaving a good gloss. I will not be using this however.
- Meguiars Swirl-X: To my experience this is nearly identical to what Color-X is except it has a thicker gloss which “masks” out paint swirls. Again I will not be using it as it is redundant for today’s detailing session.
- Meguiars Ultimate Compound: This is a serious compound and can eat up your car’s clear coat if you’re not careful with its application. Since my car doesn’t have any deep scratches, I will not be using it.
- Turtle Wax Oxy Power Out: This is a good upholstery cleaner, however its only for fabric seats and roofs. Comes with a handy brush so that application is a breeze. I won’t be using it since my car is leather equipped and the roof lining is spotless anyway.
- Mother’s Carnauba wax: This is yet again a great product but completely unsuitable for Karachi’s environment. It has one of the best gloss that I’ve seen in a carnauba wax but its not long lasting (at least in our environment).
- Specially formulated shampoo (the white bottle with yellow liquid): I imported this a while back, its a special shampoo thats great for cars. Doesn’t really have a brand but its great at picking out grime and leaving a glossy finish.
- Meguiars Insane Tire Shine: An absolutely brilliant product, not only does it make your tires look brand new:
- It adds a tone of “darkness” to anything its applied to
- You can apply it to alloy wheels which are dark colored and they’ll look great
- It also pulls dirt right out of any surface its applied to
- This is also the secret weapon I was referring to earlier that restores black to faded plastic panels. The RX-8’s side-view mirrors have a black plastic trim which can be particularly pesky in this regard.
- Meguiars Smooth Surface Clay Kit: This great kit contains two clay bars, Meguiars Quick Exterior Detailer and a wax cleaner sample. I’ll only be working with one clay bar and the surface detailer (for lubrication). It also includes a premium microfiber cloth that I will use for wiping off the clay and wax at the end.
- And finally, Meguiars Tech Wax 2.0: To my experience this is by far the best synthetic wax for a harsh environment like Karachi. Its shine really lasts up to a week. Its also very easy to apply and take off.
Other items I will be using (as pictured):
- Microfiber towels
- Microfiber application pads
- Chamois sponge/pad
- Microfiber interior detailing pad (the dark green one)
- Circular polishing machine with a 3M wool pad (extremely abrasive if not used with caution)
- Small vacuum cleaner (I didn’t take pictures of this)
Without further delay lets get started with the detailing. One of the important decisions you need to make is about the time you’ll be detailing at. You need to pick a time when its cool and direct sunlight is not hitting your car. For this reason I decided to go a bit extreme and picked 5.00AM. While its pretty dark at 5.00AM, the temperature is cool and day break is not too far away which allows one to finish the critical detailing bits when the sun rises. Also make sure you have a big working area, for this I moved all my cars out of the garage so I can walk around easily without bumping into objects.
Step 1: Washing
- First thoroughly rinse off the car, I did this using a water pump and a hose. That delivered some exceptional pressure and whacked a good amount of dust and grime right off the car. While this method wastes water (so don’t do it every week), its quick and highly effective as compared to using a bucket.
- Once the car gets its first rinse start applying shampoo to the body panels. My shampoo has a convenient spraying nozzle with a good spraying distance so this was quick and easy for me.
- I used Turtle Wax’s tire foam on the tires to get dirt out and then rinsed off the tires.
- I massaged the shampoo in thoroughly using the chamois pad. The reason I use chamois for this, is because it is gentle on the car’s surface and absorbs water well.
- At the same time, I took out my trusty Meguiars Insane Tire Shine and sprayed it on the problematic areas such as:
- The plastic trim on the side mirrors
- The fender vents
- The plastic trim running along the wiper assembly
- At the same time I also sprayed:
- Tires
- Alloy wheels
- Fender shields
- At this point the car has shampoo and lots of tire shine on several parts of it. All this needs to be sprayed off cleanly with water because it will leave grime otherwise.
- Spray it off with another dose from the hose and viola!
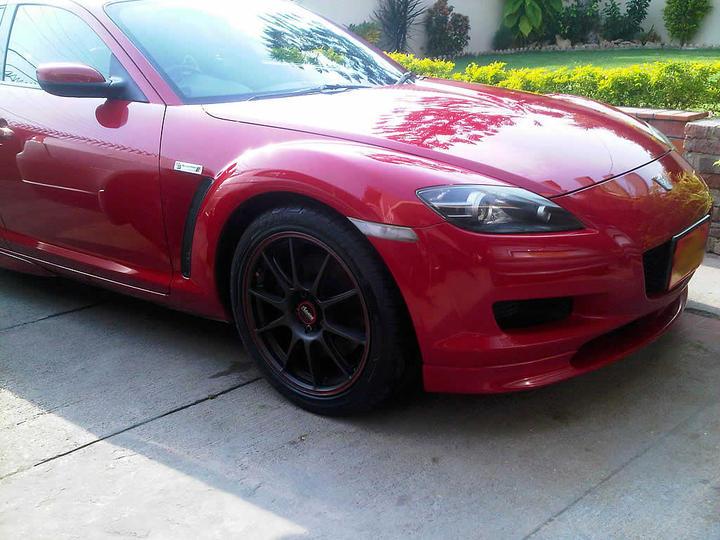
- The tire shine has done its part and the plastics look brand new and so do the tires and alloy wheels.


- Now I picked up a clean microfiber towel that will only be used for wiping the car’s body panels off.
- Fold the microfiber neatly into a square and start with one panel, and take it one panel at a time… drying out in a straight motion.
- After every panel, squeeze out the towel & “dust out” the water particles and neatly fold it again. This prevents dust from getting lodged into the towel which could leave swirls on your paint.
- The end result is as you can see… the car looks pretty clean with just a detailed wash / dry at this point. Its still pretty dark right now, as its only roughly 5:40AM so you can’t make out clearly what I’m referring to (not to mention I’m a very lazy photographer and didn’t bother using a proper camera for this session).
Step 3: Cleaning up the tire shine
- The tire shine leaves residue which should be wiped / massage onto the surface it was sprayed on.
- It also makes tires extremely slick, which although is fun in an RWD like the RX-8, at the same time is potentially very dangerous in a car without traction control. I like it slick (which eventually wears off after a few hours of driving) so I won’t be cleaning too much out of the tires.
- Take a rag and thoroughly massage your alloy wheels, tires and plastic trim. This gives the everything that was sprayed with the shine, a fantastic matte finish. For the small bits which are joined with the body panels, use a small rag because you don’t want the tire shine on the body panels.
Step 4: Interior tidbits
- I started by taking out the floor mats and vacuuming them individually, followed by a good brushing. My car has matching red floor mats which came from the factory so they have a tendency to pick up dirt like anything.
- I left the floor mats out in my garden (waiting for the sunrise so that they can get a bit of sun)
- I vacuumed the car’s seats and carpet thoroughly which took care of dust which somehow finds its way into the car regardless of how careful you are (like in my case, I don’t use the windows too often).
- I gave all the interior panels & plastics a good cleaning with a slightly damp microfiber towel. Then gave the interior bits a second run down with a completely dry microfiber towel.
- And I took some q-tips and gently massaged Meguiars PlastX onto the glossy piano black surfaces of the RX-8s interior.
- Once done applying, I left them to haze for a few minutes.
- After the PlastX hazed over, I cleaned out the haze using a clean microfiber towel.
- The result leaves the piano black trim looking brand new.
Step 5: Clay bar the exterior
What is clay bar you ask? Its exactly as the name implies, a bar of clay (treated with synthetic stuff obviously) which is great at pulling extreme grime right out of your car. This includes brake dust that has firmly settled into your car’s clear coat, tar, and numerous other paint contaminants.
This is perhaps the most difficult part of the entire session, clay bar’ing your car requires an extreme amount of patience and practice. For any detailing newbie I would suggest reading this step thoroughly and understanding the whole process properly. You can literally destroy your car’s paint / clear coat if you do this wrong, due to the abrasive nature of a clay bar. Its almost 7:10 AM at this point and the sun is up, so there is sufficient sunlight for me to start the process.
- The surface of your car may have gotten minor dust at this point, whack it off using a towel.
- The surface of the car needs to be lubricated in order to run the clay bar over its panels. With the clay kit, Meguiars provided a quick exterior detailing spray which will be used for this purpose.
- Choose a panel to work on, I started with the hood of the car. The key is to work on small portions rather than entire panels.
- I sprayed a small portion of the hood with the detailer
- Then take out the clay bar and prepare it as follows:
- The clay bar comes as a thin slice and it needs to be kneaded into a pliable block.
- Use your fingers / knuckles for this and and roll it into a neat square and knead it some more.
- Once its in a shape that you can easily maneuver on the surface of your car, you can start.
- With the clay in the proper shape, I ran the bar over the lubricated portion with a small amount of pressure. This should be a painless process and the bar should glide smoothly over the lubricated panel. It will leave a residue as you progress through the panel.
- Once you’ve done the portion, take a look at the underside of clay bar. It will have contaminants on it, these now need to be rolled into the bar, so start the rolling and kneading process again to reveal a fresh side of the bar.
- Once you’re done with a full panel, you can clean out the residue using a high quality microfiber towel. I used the one which came with the kit.
Warnings:
- If you happen to drop the clay bar, DISCARD IT, do not reuse it. You can literally scratch the paint right off your car if there are heavy contaminants in the bar.
- Always keep the surface lubricated, failure to do so will result in the clay bar eating up your car’s clear coat
- Keep watching the base portion of the clay bar for contaminants, when it becomes heavy with them, take caution to knead / roll into a new side of the bar.


- With the clay bar’ing done on the entire car at this point, and the time about 8.45AM. We progress into the second most complex phase of the session.
- I started by applying 3M’s Perfect-it rubbing compound onto the surface of my car thoroughly. The key is to use less but apply thoroughly.
- This has to be done panel by panel, do not do this to the entire car at once otherwise you’ll have contaminants sitting in the compound while you take off the compound from other bits.
- I also applied PlastX onto my headlights and taillights. PlastX needs to haze a bit for best results.
- Starting with the hood of the car, I used my circular polishing machine starting with 1500 RPM, to thoroughly massage the rubbing compound into the surface of the hood. Once it was thoroughly and evenly covered in the compound I pumped up the RPM on the polisher to the maximum of 3000 RPM.
- In straight motions I worked in a top down manner on the hood (and every other panel).
- After each panel was done, I cleaned off the residue using a clean microfiber towel.
- In the very end, I ran the polisher over the headlights and taillights at 1500 RPM (not more) to clean out the PlastX residue. I chose 1500 RPM as the polisher is not too abrasive at this speed.
Warnings:
- A circular polisher should only be used by people who can professionally handle it, if it leaves your control it can take a chunk of paint right off your.
- A wool pad like the kind I use can take your clear coat right off if used with an abrasive compound.
- The wrong amount of pressure can eat through the paint.
- I recommend an orbital polisher for lesser experienced people as it does random movements compared to the nonstop rotary movement of this machine.


- After cleaning out the mess / residue left by the compounding / polishing process, I progressed into the final stage of the entire session.
- Making sure that there is no dust on the surface of the car, or any residue from the compound I started applying the TechWax in thin even layers (emphasis on thin and even) onto the surface of the car. I did the entire surface in one go as the wax needs some time to bond with the surface.
- At this point make sure your car is not in the direct sunlight. I did this process under the shade of my garage.
- If direct sunlight hits your car while it has wax on it, the wax will bond to the extent that its damaging to the paint and also very difficult to take off.
- I let the wax bond for about 15 minutes before I rubbed it off with Meguiars premium microfiber towel.


You have done a great job.
However not all want to/can spend this much amount. So for a person like me who wants the basics done, kindly suggest what to you for for vogue silver metallic Honda city 2006 whose interior is light brown with dark brown dash board. I want to clean basics like leather seats, plastic be it dashboard or inside of doors etc.