[QUOTE=murtaza_murti;4005842]NO WAY! You are indeed beyond lucky.
Please I beg of you to start a thread about them, mentioning their history with you and their detailed specifications. I am a die-hard fan of the early Fairlady series and would absolutely love to hear about your trio.[/QUOTE
The story of these Zeds would definitely be off topic here and spans a period of 27 YEARS starting from 1973 and upto the year 2000! There is a thread called Japanese classic cars club under the cool / classic car thread. If you go to page 26 there is a sort of a first chapter there along with more photos. Go thru it, tell me what u think and will write a bit more if it intersts you. The red one in particular has been an integral part of all important moments in my life
Looking for to following your 65 VW project.
After completing my Jeep Mutt restoration, which is nearly completed, I plan to embark on my 1969 VW 1200 restoration project. Your 1965 VW project will help guide me and use your expertise help.
Omg ,not 1 ,not 2, but 3 of them old fair ladies :o I'm a die hard fan of these old beauties
Agha jee, GREAT to hear from you here also! I just hope this wont end up being a case of the blind leading the blind but am sure it will be a lot of fun no matter how it will turn out All being well and rain permitting the '65 will be moved to the denter's premises tomorrow and will start documenting the stripdown and labelling the parts that will come off. So watch this space!
Wow! That's great to know. I hope u like VW's too
Atlast!! The workshops in Lahore are back upto strength and the '65 has been shifted to one that will be home to it for the 3/4 months or so. It's going to be stripped down to bare shell and the denter will do the needful which basically means going over the car with a fine tooth comb, so to say, cutting out old rusted metal, welding and replacing as needed and then "polishing". I feel this is the best route to take as cutting corners now may well make subsequent effort futile.
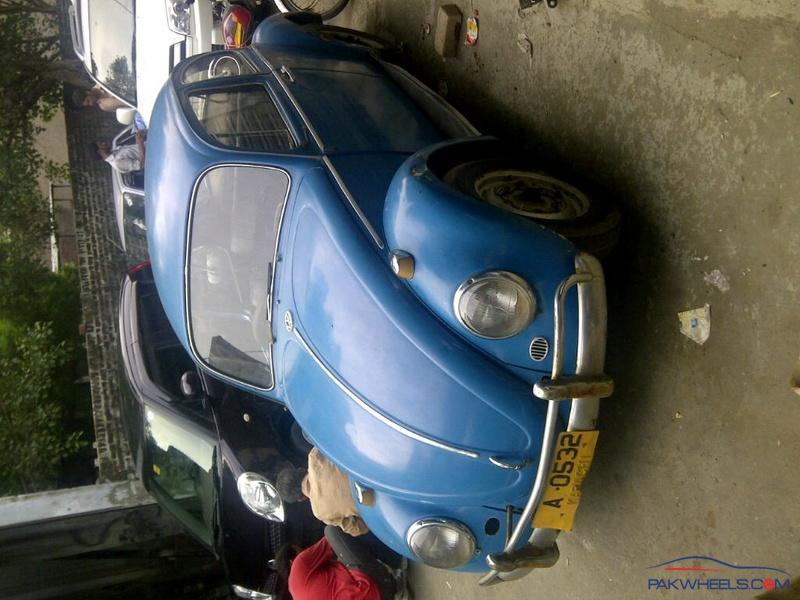
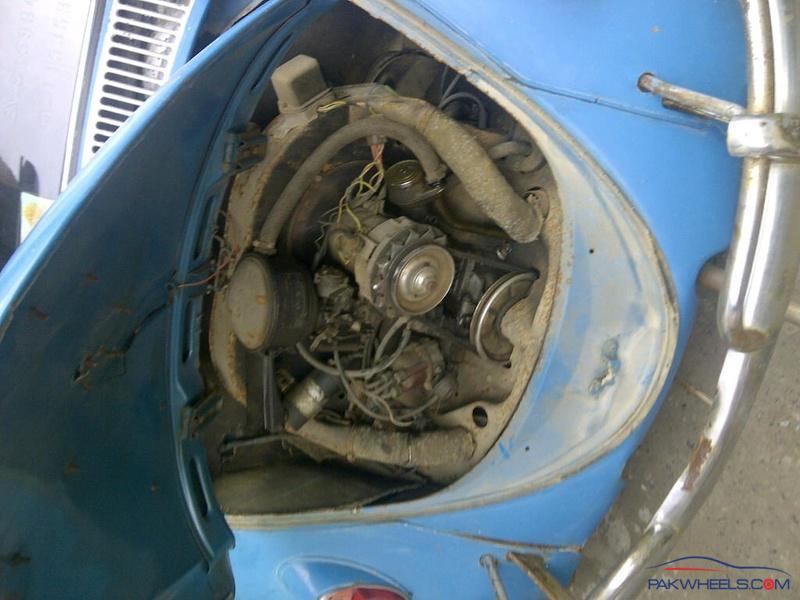
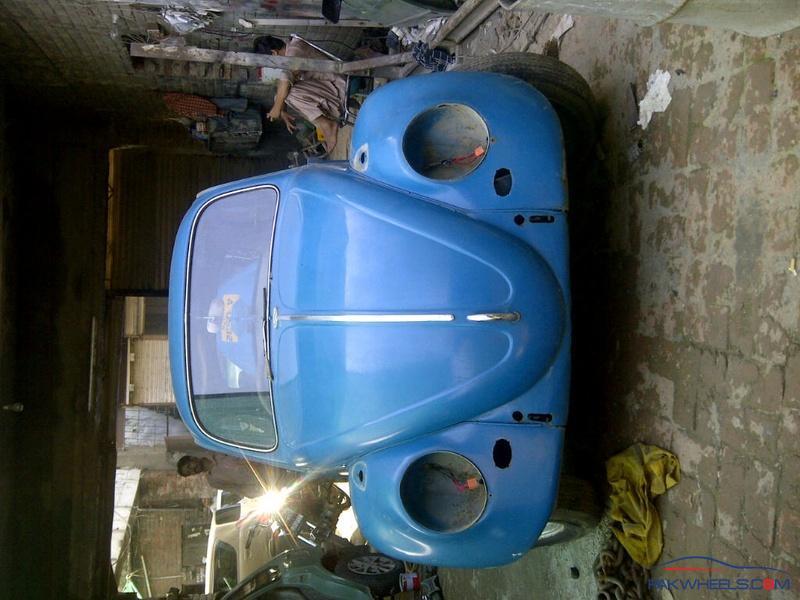
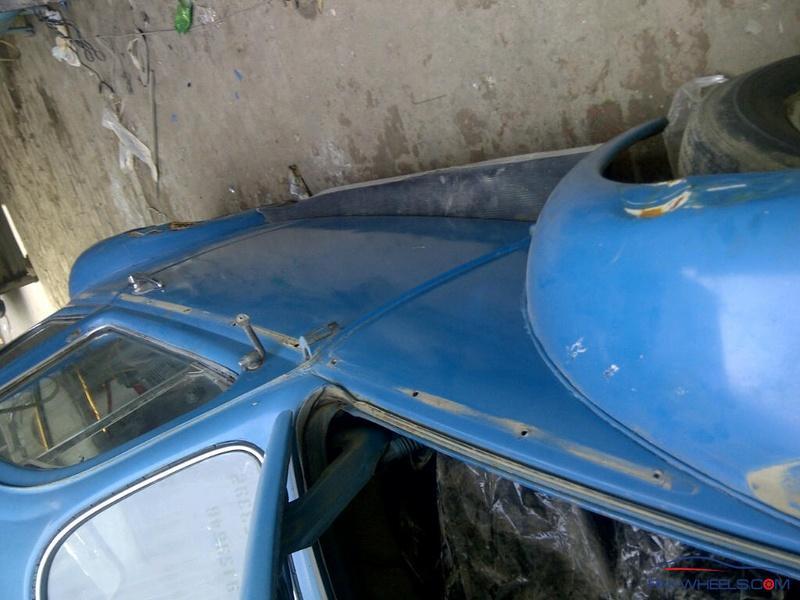
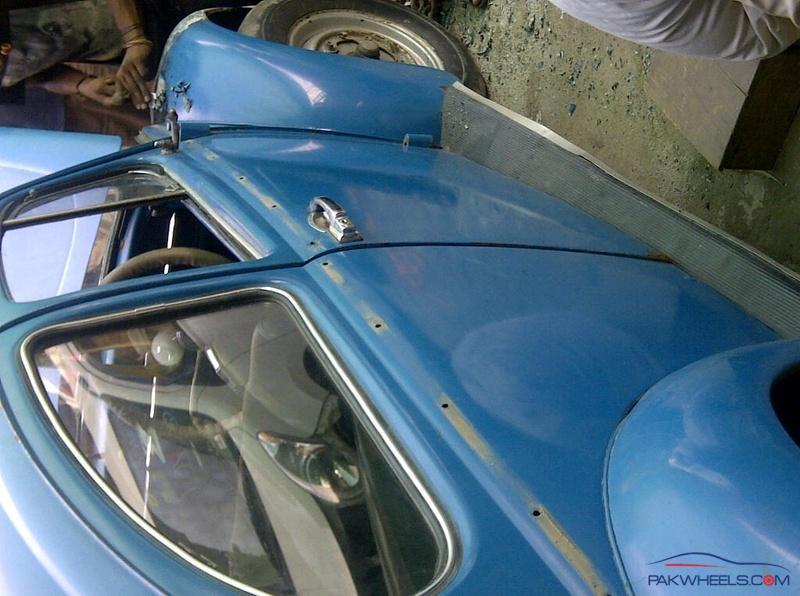
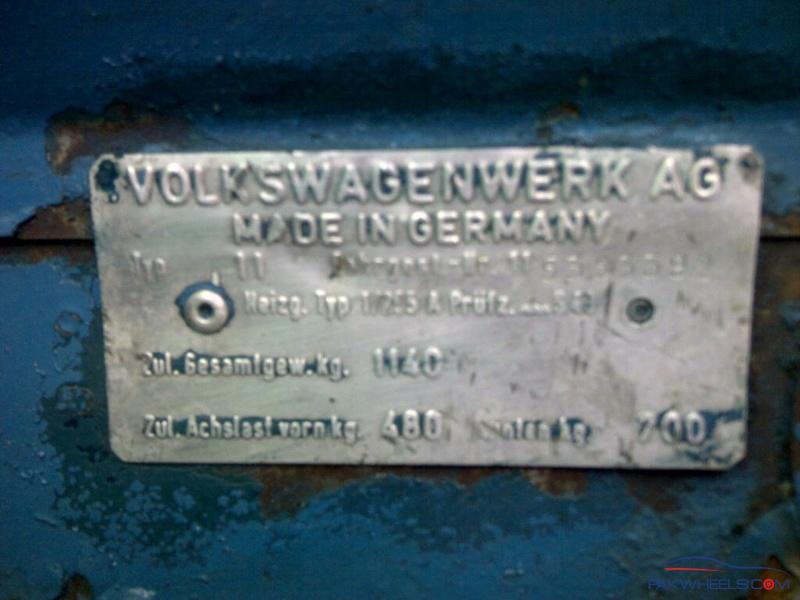
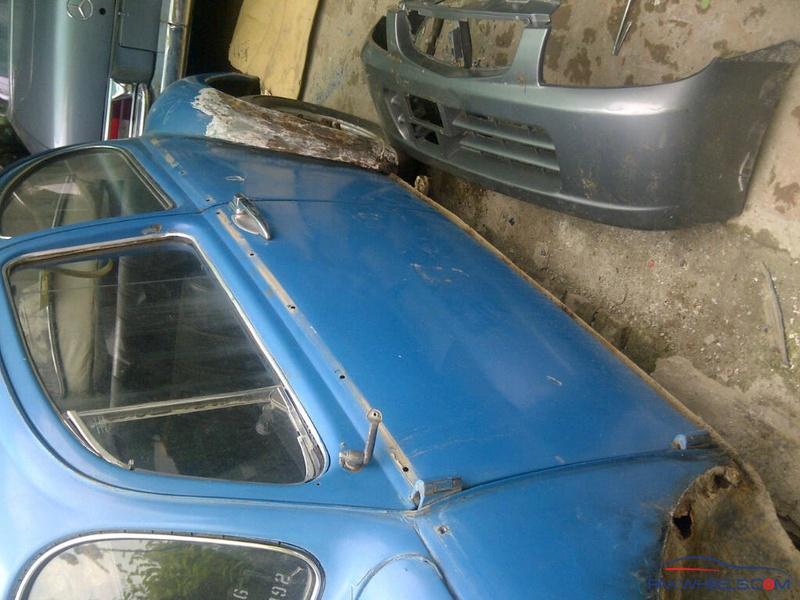
Here are today's pics: The '65 is surprisingly complete right down to the original washer bottle. This is the "taking stock" stage prior to dismantling. We may...just may...have to separate the body from the chassis.
As always, apologies for these semi inverted pics.....I haven't been able to figure out why it happens esp as so many come out okay. If anyone can help in this, please do. I use a blackberry 'torch' to take them.
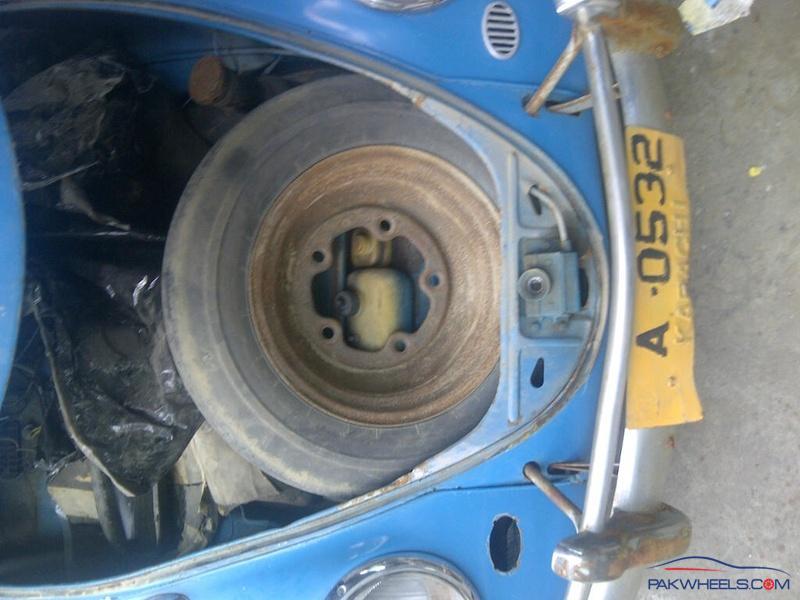
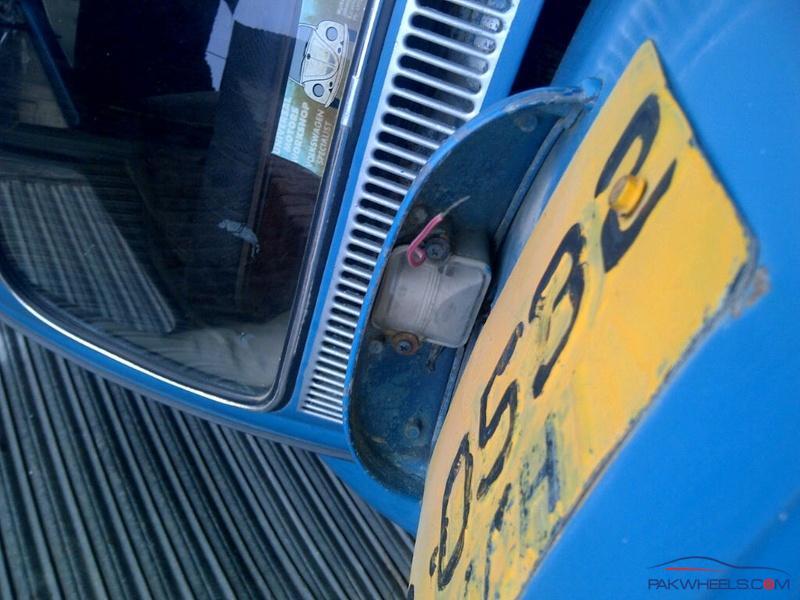
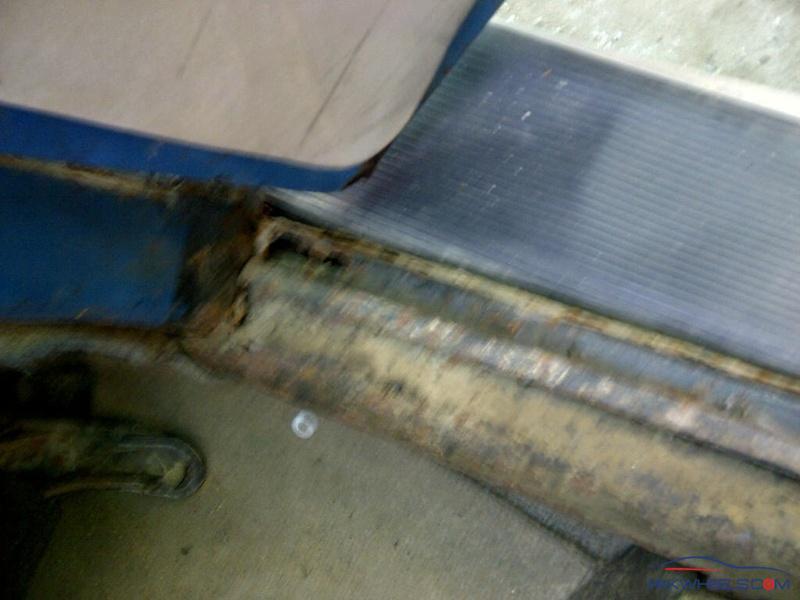
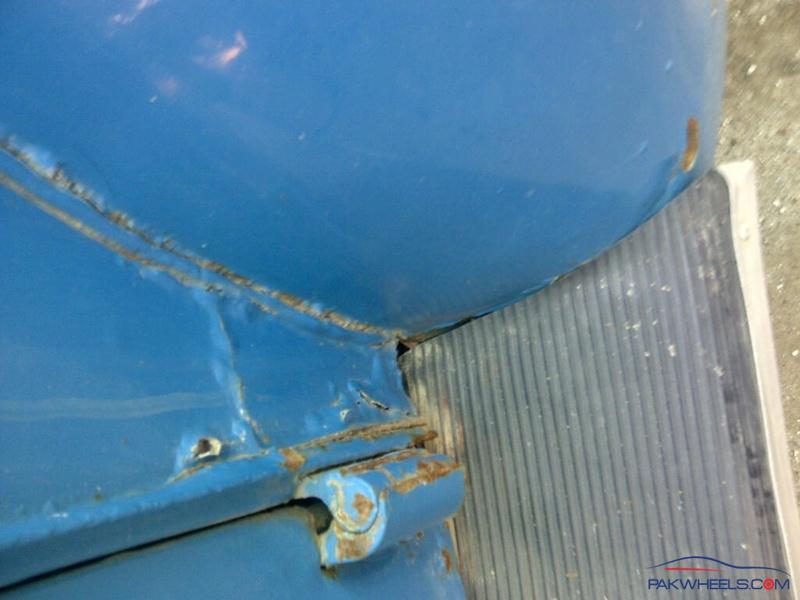
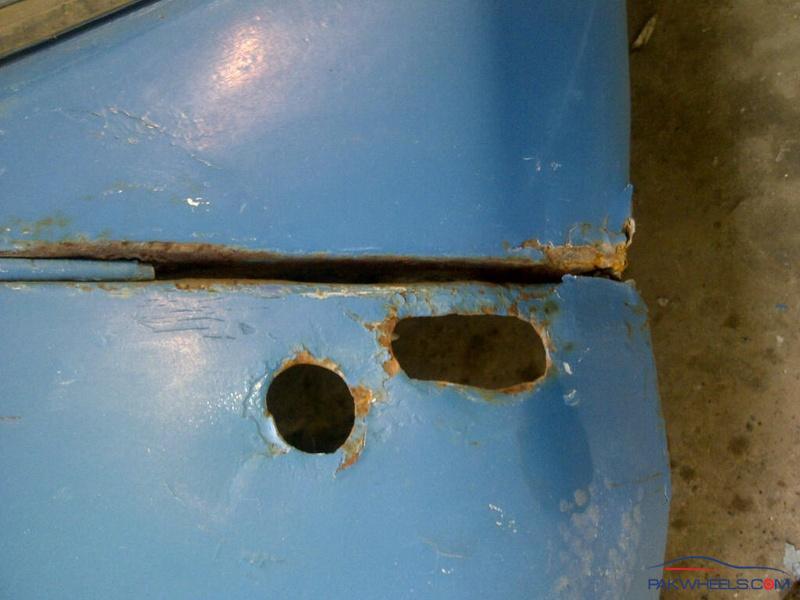
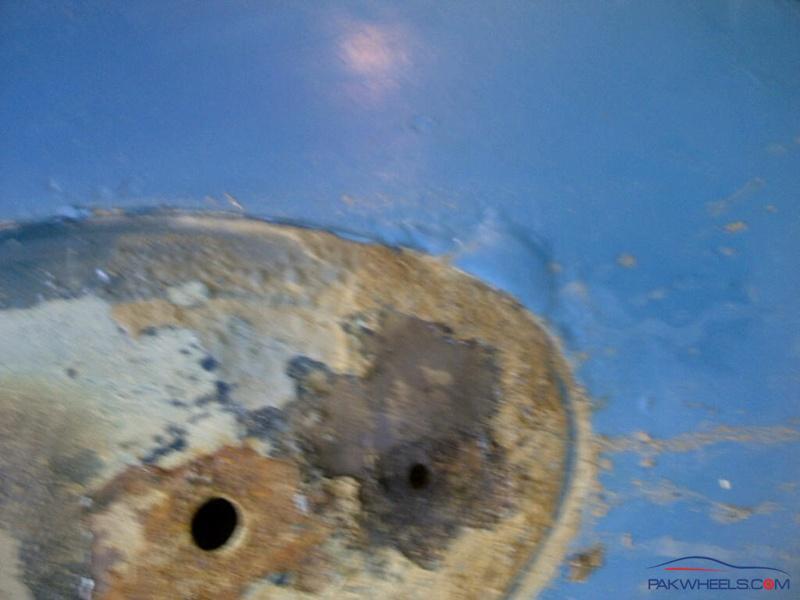
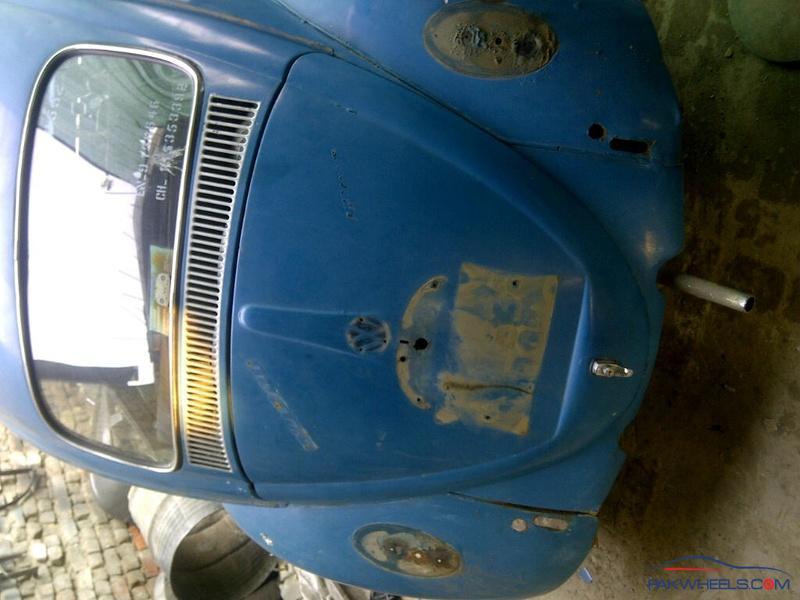
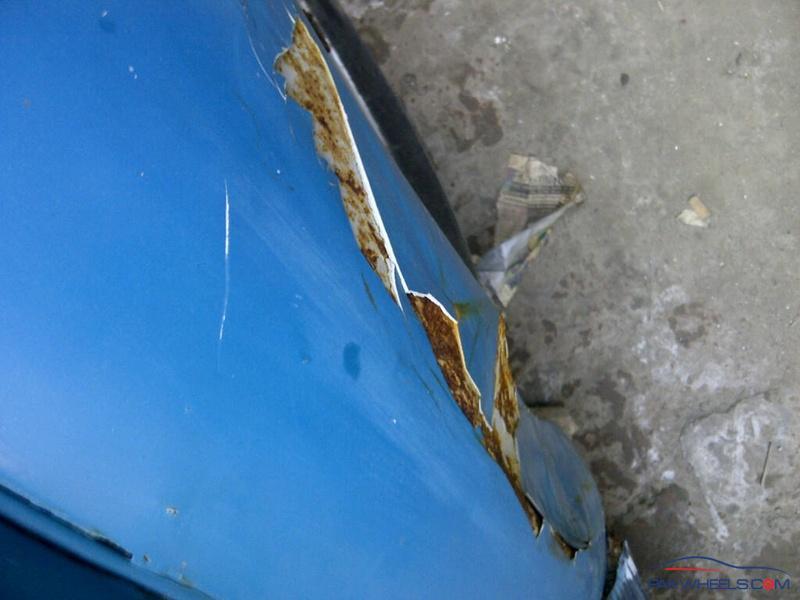
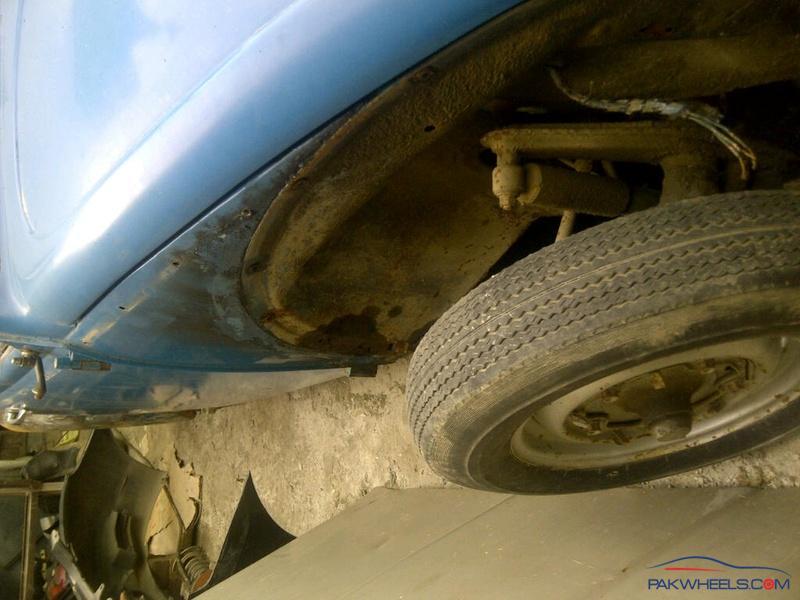
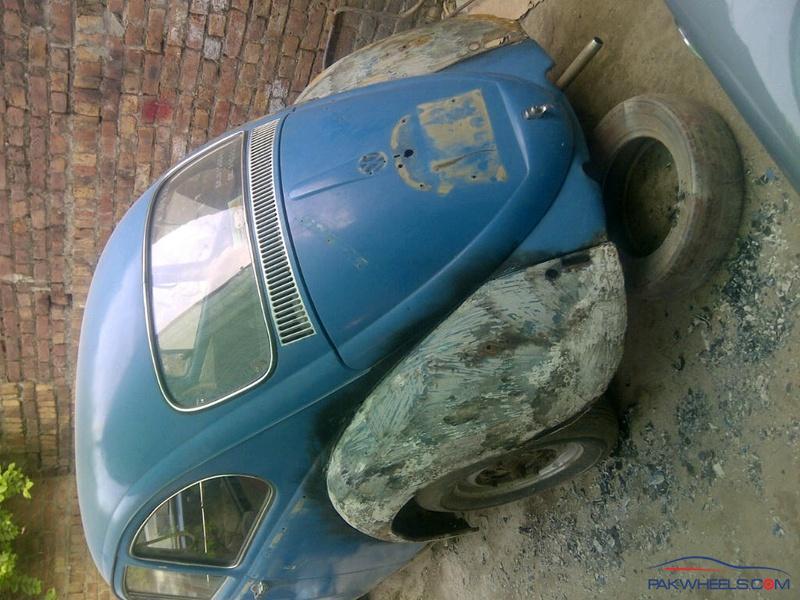
Stripdown: all lights and bumpers have been removed. These will be followed by running boards, brightwork, seats and all upholstery. The pictures below show what has been done so far. As is almost always the case with a car of such vintage, we expect to uncover horrors underneath. Some of the pics confirm this already, which is why it is essential to strip the '65 down to whatever bare metal it has left! The hinges of the driver's door actually make the door sill move when the door is rocked on them!
Having said this, it's a good little car and deserves resurrection
Great
but please do something about the direction of pics, already feeling pain in neck from your other thread
Believe me I would like nothing better than to fix this! I have no idea why this happens and what to do when it does!!!!! Any help would be HUGELY appreciated. I use a blackberry "torch" fone to take the pics. They come out ok on that and stay ok even when I transfer them on to the iPad that I use. It's when I transfer them from the albums to the thread is when it can all go wonky.....as I said, I don't know how to fix this! I know how annoying that can be and I apologise for being a pain in the neck!
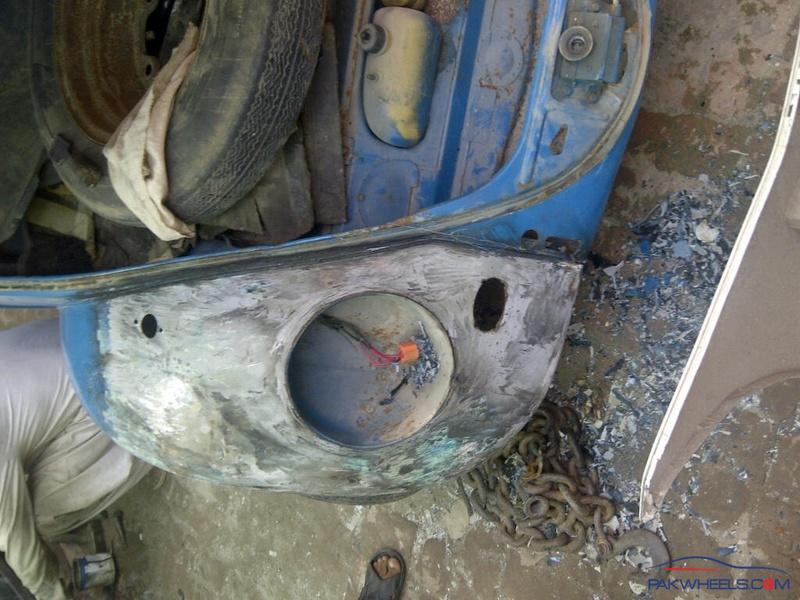
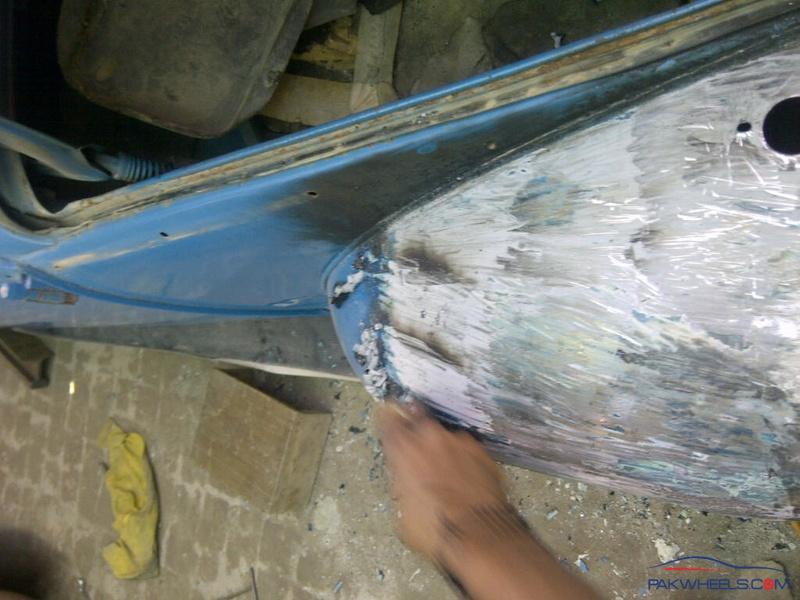
Denting is picking up pace. The plan is to scrape off the existing paint and old filler etc from each wing. Then cut out the rusted bits, weld in new metal and knock it into shape as per the original design. Then it will be "polished", covered with a liberal coating of old engine oil and put to one side. This will be done for all 4 wings.
Next stage , both the doors will come off and go thru a similar process. After this, work will start on the main body with cutting, fabricating, welding, smoothing etc. The "off the shelf" running boards are not at all to my liking, so will be getting those fabricated as well.
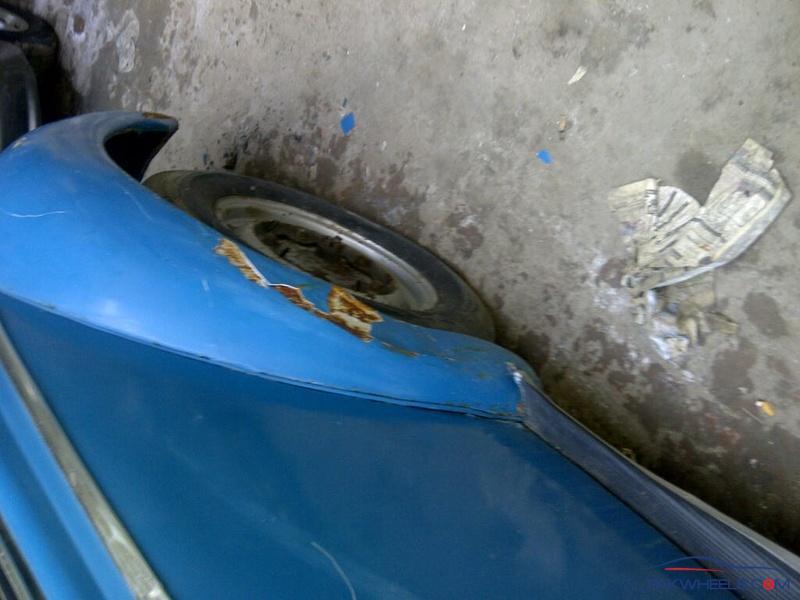
Some more pictures. The last one shows a healthy dose of filler on the damaged rear left wing.
AGAIN!!! APOLOGIES FOR THEM BEING INVERTED!!!!!!
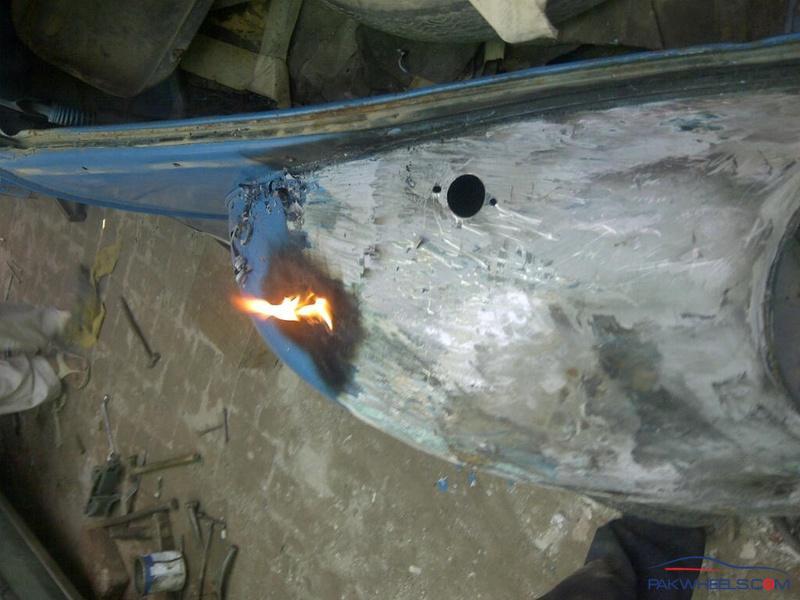
Seems to be moving fast. Is there a timeframe for it. Sees the painter is burning the paint. Is it not better to use paint remover (cost Rs 240 /bottle.
At this stage it looks like that but this is going to take about 3 months as the deal worked out is that work on the'65 will slow down when bread and butter stuff comes in. This consideration is reflected in the denting cost ; thought it to be worthwhile to go aling with this as don't have to have it all done by a specific date.
In my experience I find it better to remove the paint like this where extensive denting is involved, as in here. Otherwise yes, paint remover is an easier option. However, where virtually the whole car (other than the roof) is to panel beaten, the cost, even at Rs.240 a bottle would mount up
Sir the burning method is not good. I reduces the strength of the German Metal. Use paint stripper
I agree and you are right about the metallurgy. The heat applied is very slight compared to the flame used during denting. Here the paint is just made to blister so that it gets soft enough for the scraper to remove most of it . My denter prefers this method but the painter goes for the stripper(!) and the arguments for and against , between these two, never end
The paint remover did more good than harm to the metal. It was less strenuous to the painter. My Jeep mutt used about 10 cans @ Rs 240/ca. A total cost of Rs2400 max. Well worth it, as I saw the end results.
I would suggest you start hunting for a full kit of rubber gaskets for the body. Nothing makes a VW bug come alive than proper rubber pieces.
btw - get the guy to strip the paint with stripper and then buff the car with a very fine tooth wire wheel. to make sanding proper get an ancient oldschool carpenter and make a few pieces in the contour of the body so it can be sanded evenly.
also get some rubber pads to help in the sanding of the round areas. Before anything I would flip the car upside down and rework every little piece (even inside the tunnel). These are very simply built cars and would take very little effort to bring back correctly unlike MB which are built to a very higher quality.
hello, nice to hear from you here too. The hunt for rubber gaskets is already on. A shop here in Lahore has offered to get a full set "Laikin barrazeeel ka maal hai jee".
I sit on the fence, so to say, when it comes to this debate about how to remove old paint and have never given it much thought till now. Perhaps you could explain I think will use both methods and see the end results. The fine tooth wire wheel does get used but I like the idea of using the services of a carpenter! I know of one, he made the wood strips that go on the inside of the window frames on the doors of the W109.
Before the car can be flipped over some preliminary repairs have to be made to the chassis frame as it is cracked near the front suspension area. Any suggestions on how best to do that would be welcome. Will post pictures about it.
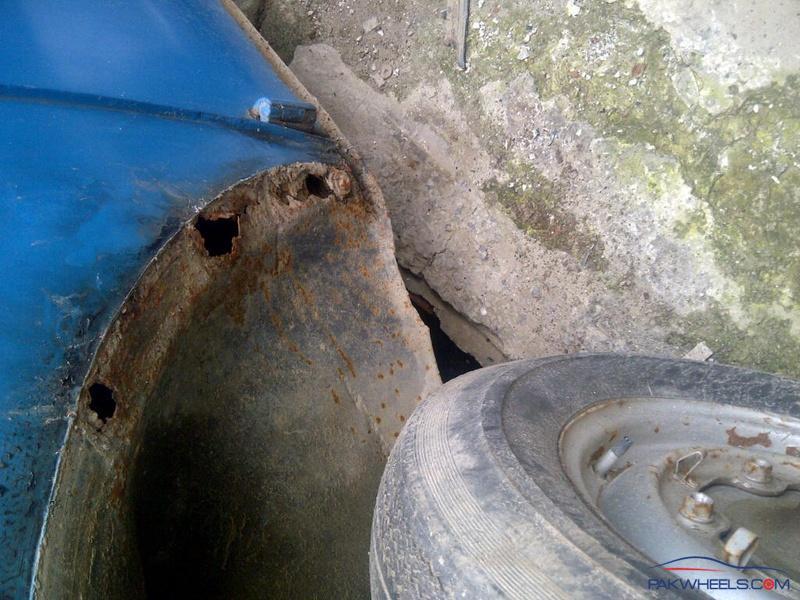
Time for some inverted pictures again! Sorry guys! Work on the '65 is going on. For now it's mainly strip down. Check out the corrosion on the left inner wing. No smooth sailing here either, THAT'S for sure:)
What a mess!!!