A carby cleaner will do the cleaning job much effectively than the WD40.
IACV is held by two 12mm bolts so you need a 12mm socket to open it, a 1/4" drive ratchet handle and extension rod of 3" (or any smallest avaialble length) will be very handy to use. Further you need a long reach nose plier to press and remove the hose spring clamps, a simple plier will also do the job.
If you don't have these tools, invest in them as you will require them every now and then.
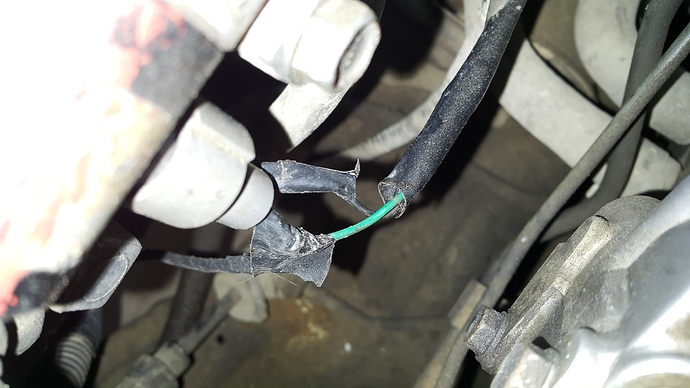
First remove the electrical connector then with the help of plier squeeze the two coolant lines spring clamps and slide them down on the pipes so that you don't loose them. Remove the two coolant rubber pipes, if they are sticky hold them tightly in fingers and give a little circular motion over their ends to breake the sticky bond but don't use plier for this purpose, also note the order of pipes you will have to install them in the same order later on.
Some coolant will spill out in this process, you need not to worry just cover the ends so that no foreign particle goes inside them. You may make use of insulation tape for this purpose or just wrap a small polythene bag around the pipes end. You will need to replenish the coolant level at the end of this DIY.
Unfasten the two bolts, check if both are of same lenght, to avoid confusion it is advisable to put each bolt back in the same threaded hole.
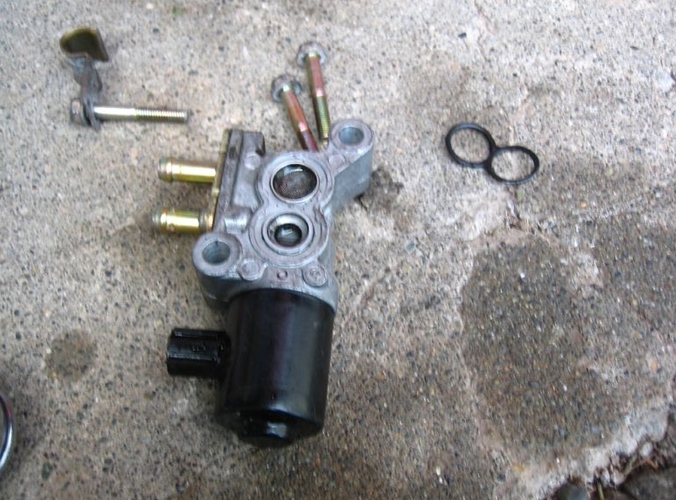
Now remove the IACV slowly, spray carby cleaner on the surface just exposed beneath the IACV on the IM (intake manifold) and with the help of an old tooth brush rub the surface to clean it properly. Also clean the two holes just exposed on the IM from inside with a cloth.
Remove O-ring from the IACV, if previously silicone was used for sealing then remove the leftover silicone carefully from over the O-ring. Now making use of carby cleaner fill both the holes of the IACV and leave it for some time then dab it on your palm to dislodge the debris inside, repeat this process three to four times. With the help of a tooth brush clean it thoroughly especially the guaze filter.
Also check that the coolant flow path is free from any restriction, try to run tap water in it to check it. In the end place the IACV in inverted position and leave it for a while to dry it in the air.
photo courtesy of honda-tech.com
Now inspect the O-ring if it is deshaped, then apply a very thin layer of some good quality silicone on the O-ring and and install it back on the IM.
When fastening the bolts hand tight them first, then with the help of a ratchet tool (or spanner) tight each bolt by half or quarter turn and keep them tighening till the end this will ensure that O-ring is properly seated underneath. A torque wrench is highly recommended for this purpose.
If you need any further assistance we are here to help you.