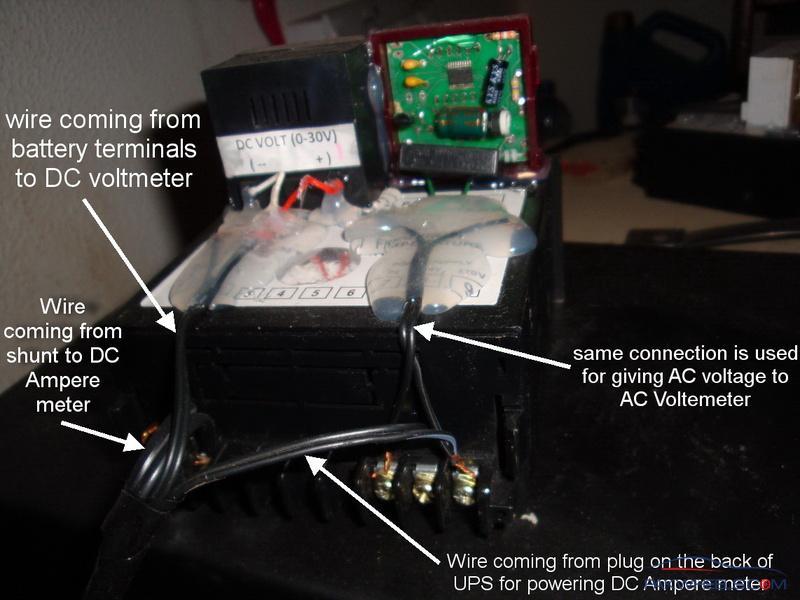
Well it?s quite easy to install and calibrate all the 3 meters. For making it as a single unit, I have glued the three meters together using hot glue gun. This ensured future modifications too as it?s quite easy to remove the glue using hot air from hair dryer or any other source.
Below is a small pictorial guide for installation of digital panel meters.
DC Volt Meter Installation:
DC volt meter has two outgoing wires on back labeled as (+) and (-).
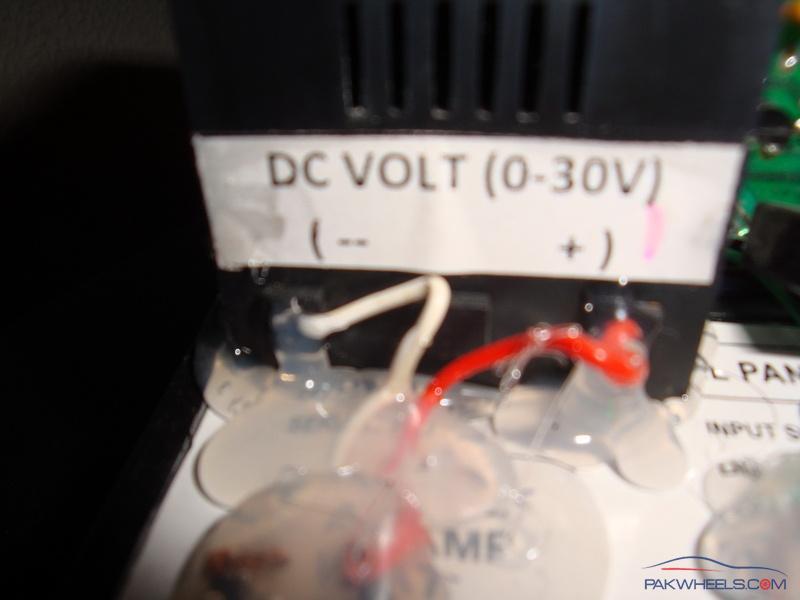
Connect the positive wire to positive terminal of the battery and negative wire to negative terminal of battery.
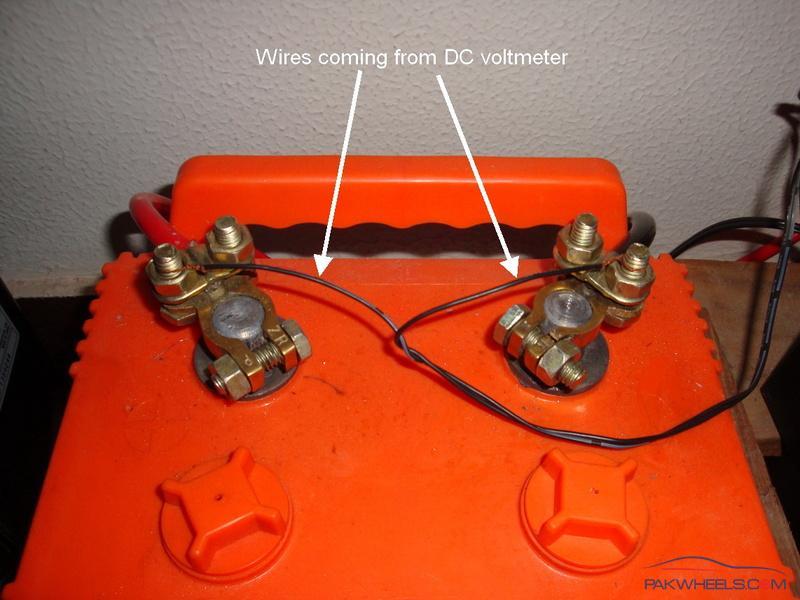
You can use small alligator clips for this attachment too.
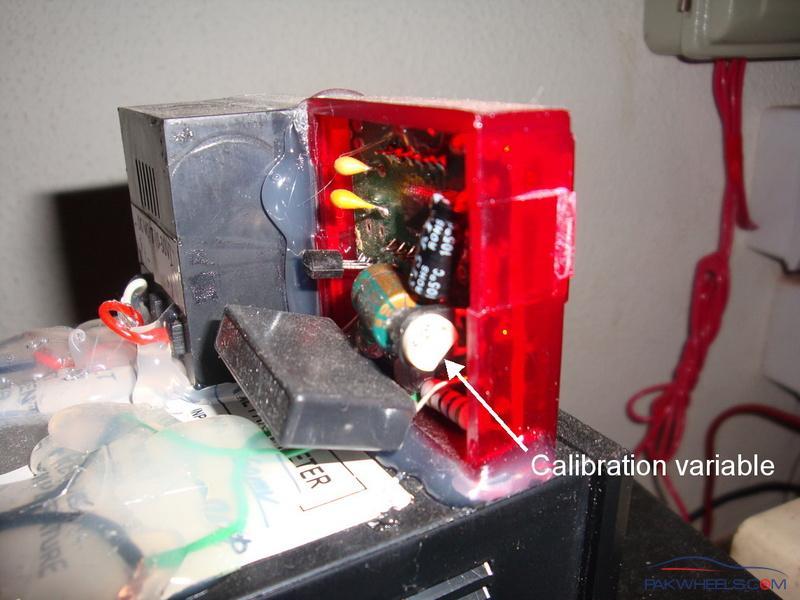
Calibration:
You can calibrate the DC voltmeter with some standard multimeter up to one decimal place by rotating finely the variable present on front of DC voltmeter.
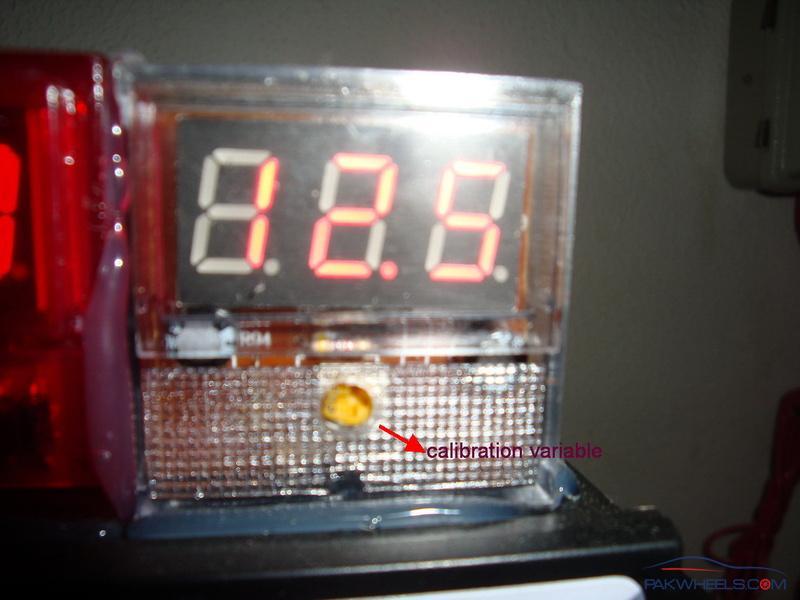
For calibration purposes, attach the terminals of multimeter to the battery terminals and finely rotate (usually clockwise for increasing values and anticlockwise for decreasing values) the variable present on front of DC voltmeter. Always wait for 5 minutes keeping an eye on both digital panel voltmeter and multimeter screens that both are showing the same readings. Usually these digital panel DC voltmeters require fine calibration of only 0.2 to 0.3 volts.
AC Volt Meter Installation:
AC voltmeter is the easiest to install as you just have to attach the wires coming out from the panel AC volt meter to the output of UPS. You can use the output plug of UPS for attaching the wires of AC voltmeter to the back of UPS.
The digital panel AC volt meter which I am using is small and open from back and is quite cheap. The AC panel voltmeters which are completely closed, used for displaying voltages on Electricity panels of houses are also easily available for couple of hundred rupees more but those are slightly bulkier as compared to this one and I felt it would be little problematic for gluing it together with remaining two meters.
Calibration:
Again the AC Voltmeter is calibrated by rotating the variable clockwise or anticlock wise present on the back as shown in picture.
The panel AC voltmeters used in electricity panels of houses has calibration variable below the sticker on front face of the meter. You can easily remove that sticker by carefully peeling it off. Multimeter terminals are also inserted in the output of UPS or if wapda electricity is working you can also attach the multimeter terminals on the same switch board on which the UPS is attached. Again wait for 5 minutes after calibration keeping an eye on both digital panel AC voltmeter and multimeter screens that both are showing the same readings. Usually these meters require adjustment of +- 2 to 10 volts.
DC Ampere Meter Installation:
I recommend an ampere meter which has a rating of 100 amps as this will be sufficient for 1 KVA UPS. I am using PUMA DC Ampere meter which is industrial grade and usually requires no calibration.
Installation of this meter is bit tricky as you have to place in a shunt in the circuit for measuring current.
First of all make sure that UPS is turned off and unplugged from main powers and both positive and negative thick wires attached to the battery terminals are safely removed and separated from each other.
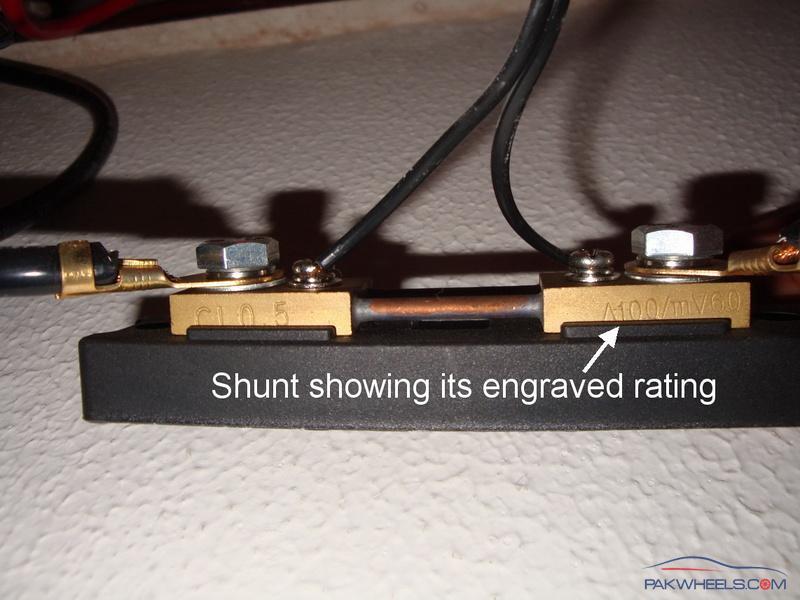
Cut any one of the two thick wires (either red or black) in the center coming out of the UPS (I have used black wire for attaching the Shunt). Attach the large ring terminal wire connectors on both cut ends of wire. Make sure that these connectors are securely and tightly attached with no looseness. Attach the two ends of the wire with ring terminals to the large bolts on the outer sides of the shunt as shown in picture.
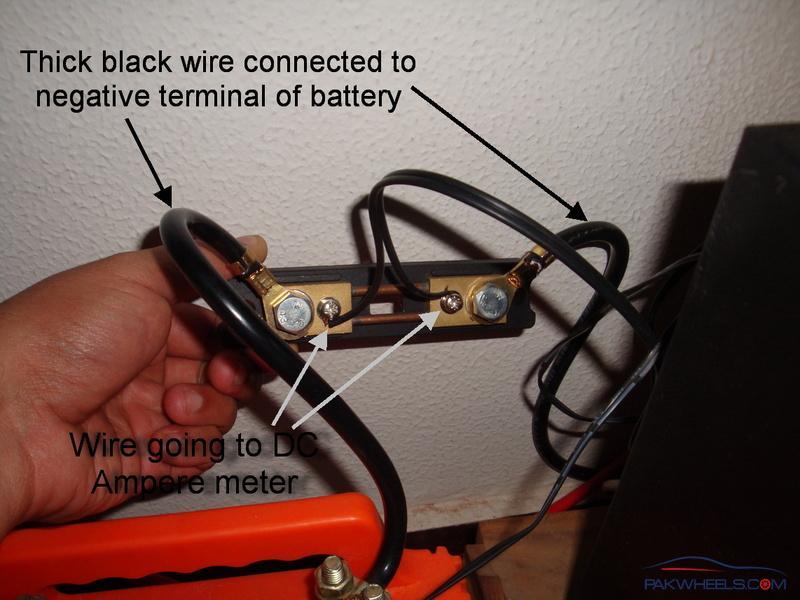
Tight the bolts to maximum using appropriate number spanner. Ensure that these connections are tight with no movement or loosing at all as this is the circuit through which large amount of current will be passing.
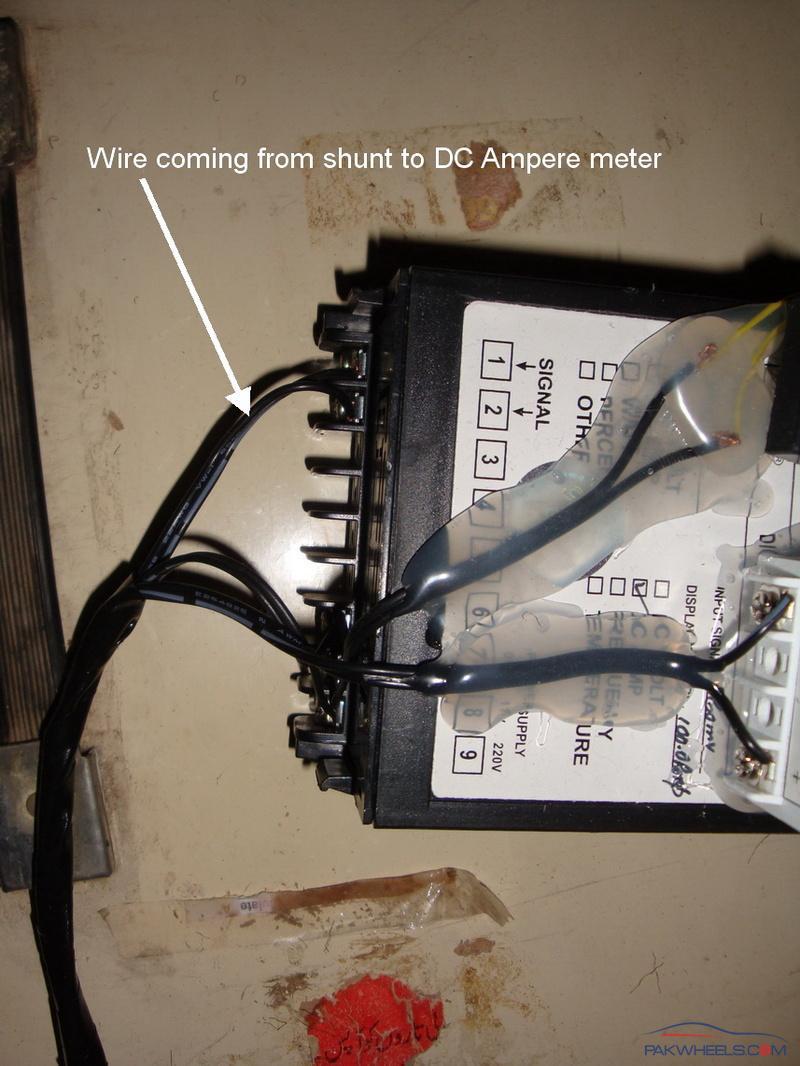
Now attach two wires, each to the small screws on the inner side of the shunt as shown in above picture. These wires are then connected to the input signal terminals of the ampere meter as shown below.
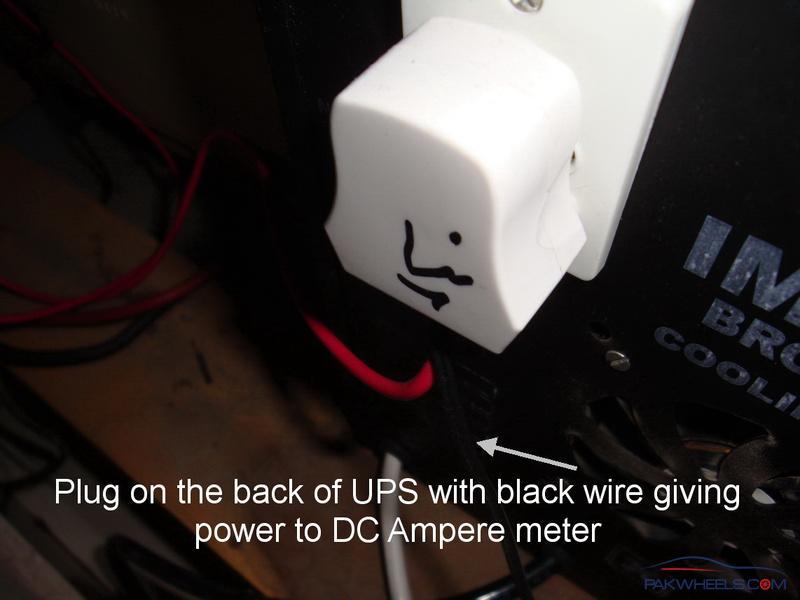
Ampere meter also requires 110 or 220 volts AC power for working. Again I have given this power from output of UPS using the plug on the back of UPS. This ensures that ampere meter display is working during power outages.
Calibration:
PUMA ampere meters are industrial grade and require no calibration. However, if one still wants to check whether it?s giving the right reading or not, digital multimeter with ability to check milli volts can be used. Also there is a calibration variable inside the ampere meter which can be used for very fine tuning.
In order to check the current flowing through the circuit, attach the terminals of multimeter to the inner screws of shunt. When the current is passing, there is a potential difference across the shunt which is being measured by digital multimeter. The resistance of shunt I am using is 0.0006 ohm (100Amp/60mV). This rating is mentioned on the shunt as shown in picture.
One can easily calculate the current in amperes by using Ohm?s law (dividing the voltage shown on multimeter by resistance of shunt). Suppose multimeter is showing (6.9 milli volts) then DC current passing through circuits is (6.9/1000=0.0069 volts) divided by 0.0006, which equals 11.5 Amperes. You can check whether your Digital panel DC Ampere meter display is giving the same value or not. Difference of half an ampere is always acceptable.


